Above Ground Pool Liner Installation
This Is The Way I Do It
This page will illustrate my preferred way of installing an above ground pool
liner. There are different types of liners and many different installation
situations. We have learned to adapt to all of them, but this is our
favorite type of liner installation.
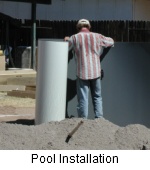
We start with a pool that has an overlap liner and no decking up against the
pool. The first step is to tape over any sharp edges of the pool frame.
The top connectors may have sharp edges that need to be well taped. This
liner was going into a Doughboy pool that is designed for this type of
installation. The only taping was to cover the holes the ladder was bolted
through and the base of a few connection covers that were broke.
We use a large push broom to smooth the sand base. With the base smooth
and the rough edges taped we find a good location to open up the liner. I
always open the liners and roll them up again out of the pool From outside
the pool we gently set the liner into the pool and start pulling the sides up
and over the top rails.
It is
not uncommon to get 2/3rds the way around the pool and run out of
liner. Many liners are just made small. They will fit however.
Bright sunlight is sometimes needed. It softens the liner and enables you
to be able to stretch it. When the liner is tight, go back to the
beginning and pull it a little tighter. At this point you should only have
a few inches of liner hanging over the top rail. Keep pulling and working
the liner until it is all over the top rail.
Now you will start pulling
the liner up and over each rail connection, a little at a time, until the bottom
seam is a few inches from the top rail. At this point the liner in the
center of the pool should be just barely touching the base.
At this time you start the water filling. It is usually necessary to go
around the pool every ten to fifteen minutes and let the liner down at each
connection. When the water is about four inches away from the edge you
should shut the water off and start taking the pool apart. Only remove
three or four rails at a time. Set the liner into place and reassemble
the pool. I take the pool
apart and use cloths pins to hold the liner in place after tucking and setting.
One of my helpers will follow behind, installing the coping, rods and top rails.
Done a few rails at a time the pool is never left without support. Windy days
never keep us from doing our job.
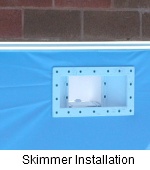
Wait until the water is a few inches up the wall and install the skimmer and
return.
We do pool and liner installations all over the state of Arizona. Check this page for prices.
Below are some more of my illustrated installation pages with plenty of help and advice.
Oval Pool Installation
Diamond Star Above Ground Pool
Atlantic Above Ground Pool
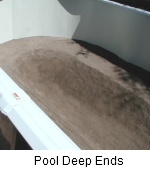
Oval Pool Deep Ends
Diamond Star Installation
Quest Oval Pool Installation
LX Oval Pool Review
Above Ground Swimming Pool Installation
Aqua Leader Installation
Above Ground Oval Installation
Expandable Liner Installation
Above Ground Pool Deep Ends
Be sure to check the links below for more information about above ground pool liner
installations. If you have questions about your installation be sure to
ask the pool pro.
top of Above Ground Pool Liner Installation
Enjoy this page? Please pay it forward. Here's how...
Would you prefer to share this page with others by linking to it?
- Click on the HTML link code below.
- Copy and paste it, adding a note of your own, into your blog, a Web page, forums, a blog comment, your Facebook account, or anywhere that someone would find this page valuable.


Would you prefer to share this page with others by linking to it?