Move an Above Ground Pool
Pool Moving Tips
Do you need to move an above ground pool, get it from one place to the next? Maybe you bought a new home and would like to take the pool with you, or maybe you bought a used above ground pool and are responsible for getting it moved.
It's very possible to move an above ground pool to a new location and reinstall it. Myself and a helper can have an above ground pool completely out of a back yard in less than an hour, loaded into a pickup and on it's way to a new location.

Photographs can be used in several different ways, or they may not be used at all, but at least you will have them. Legal disputes as to the condition of the pool and pool equipment can be easily resolved with photographs. Many issues you may have reinstalling your pool can be resolved by looking at the photos of how the pool looked before you took it down. If you continue taking pictures during the entire take down process the installation becomes that much easier. The exact location of the filter may seem unimportant at the time of the take down, but could be very important during the install, especially on oval pools.

Hopefully you have taken a lot of pictures and are ready to begin the take down. My helper will begin working his way around the pool removing the decorative top caps and laying them on the top rails. He will also remove all the screws holding the top rails in place. While this is being done I head to the filter and get it ready to move.
In the filter area I first remove the plug if it is a sand filter, trying to get as much of the heavy water as possible out of the tank. The hoses to the skimmer and return are removed next. If there is a backwash hose in place it should come off also. I take the basket out of the skimmer and use it to hold hose clamps, plugs and any other small parts I don't want to loose.
The skimmer and return come off next. When the skimmer is off I lay the gaskets and faceplate back in place on the skimmer and install all the screws. Now nothing will get lost, and if the gaskets are reusable, they do not get bent or brake during the move. I do the same with the return, reassemble all the parts and nothing gets lost.
By now we are ready to start loading the pool into the truck. We use both a two wheeled hand truck, or dolly, and a wheelbarrow. The wheelbarrow is taken around the pool and the top caps and top rails are carefully place into it. If you overfill the wheelbarrow it will fall over every time. Take smaller loads and make a couple of extra trips out to the truck. The hand truck is used to start getting the filter and pad out of the yard.
Second most important tip when you move an above ground pool
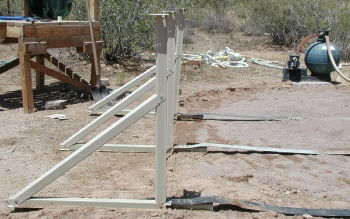
At this point the pool is still very secure and protected from being blown down with a small breeze. We have taken off the top rails but left the uprights and retaining rods in place. The rest of the process can be done in a way that the pool is always secure and protected from the wind. If you take every thing off the pool and just leave the wall standing you are really asking for trouble. For any of several reasons it will fall over. This is not only an aggravation but it will dent, crease and damage the pool wall. So let's get the wall out of the yard without it falling over.
The upright and top plate at the wall joint location need to be removed. Normally I start unbolting the wall while my helper removes a few more uprights and caps. The metal rods and coping are taken off, in this area, at this time. There is now about fifteen feet of unprotected pool wall and it is time to start rolling it up.
The pool instruction booklet, the one that comes with all above ground pools, it says to never install a pool on a windy day. I do this for a living and if I did not work on windy days I would seldom work. My take down and installation methods are based on the assumption that everyday is a windy day and a sidewall should never be unprotected, or allowed to blow down.
With that in mind, the same method is used to take a pool down as is used to install it. Take some of the pool apart and roll the wall up, take some more apart and roll the wall a little more. You have at least two people working in an area of about fifteen feet. If you both stretch out you arms as far as they go and place your hands on the pool wall, this fifteen feet plus the coil of rolled up wall, can all be protected in the event of a breeze.
I always start rolling the wall going away from the skimmer location. This leaves these openings at the end of the roll, visible in most cases. When you are reinstalling the pool there is no guess work in matching the openings with your designated filter location.
When the wall is rolled up, tie it and move it with the hand truck. If the wall is taken to a concrete area it is usually possible for the roll to be tightened up, making a smaller, easier to handle, package.
All that is left now are the bottom rails and footplates. Be very careful removing these from the ground. If you need to remove dirt or sand take the time to do it. Pulling the bottom rails from the ground with too much force can easily bend them and make them unusable. We run a screw driver blade down the groove in the bottom rails to knock a little of the dirt and sand out, making them lighter and easier to handle.
Count your parts before you leave the yard. Footplates and bottom rails can be easily lost in the sand if you are not careful. Make sure you have the correct number of everything before you leave. Another thing we do before we leave the job site is to empty our screw bags. Everything that came out of this pool goes into the skimmer basket I started filling up earlier.
Hopefully the advice on this page will help you the next time you have to move an above ground pool.
If you are in Arizona and don't want to do this, use my contact form and let me know. I can help.
Check here for our Arizona installation prices.