Vinyl Skirting Installation
Do-It-Yourself Skirting Tips
Vinyl Skirting Installation
If the skirting on your mobile home or park model is looking a little on the shabby side consider replacing it with vinyl skirting.

Vinyl skirting is easier to install than aluminum or wood. It will also retain it's great looks much longer. Vinyl skirting is a very sound investment. It is one of those items that will more than pay for itself if you were to sell your home.
Vinyl skirting installation is a fairly easy do-it-yourself project. If you have a variable speed drill, a level, a hammer and a caulking gun you are all set. If you have old skirting that you are removing pay close attention to how it all comes apart. Vinyl skirting is not that different from aluminum.
The first thing you will need to do is mark a line where the backside of the bottom track will go. You can attach a torpedo level to a 2x4 or use a 4' level. With the level against your home mark a line on the concrete or in the dirt. The line should be directly under the front side of your home. You should do this all the way around the home placing marks about every 5' or so. A time saving short cut is to place a mark at each corner and use a chalk line. This will make a straight line down the entire side of your home.
The bottom channel is the first component to install. The back side of the bottom channel will rest on the lines you made. The channel can be attached on top of the dirt with skirting spikes (very long nails) placed about every 5'. When you are working on concrete you can use either concrete anchors or liquid nail to secure the track. Concrete anchors are typically Rawl plugs that require a 1/4" hole to be drilled into the concrete. The plug is then inserted with a hammer.

The backing should be placed several inches up onto your home and be level all the way around. Many times you can follow a line on your siding or some other marking that will give you a level line to work with. If one does not exist you can use a chalk line from corner to corner to create a level line.
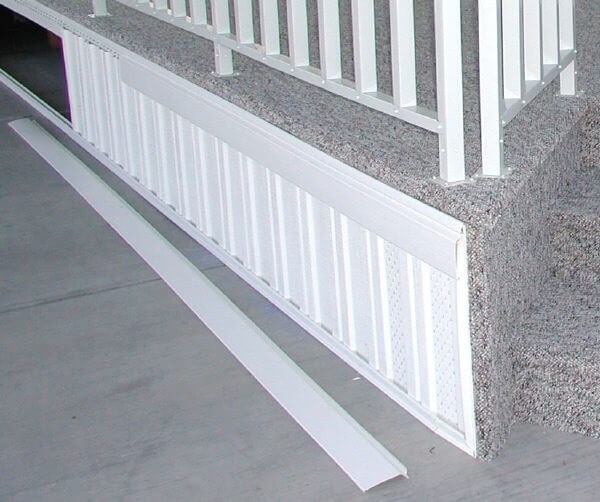
The panels are next to be installed. They will arrive in 12' lengths and need to be cut to size. Tin snips are the best way to cut the panels. You will need to measure from the ground to about an inch below the lip on the backer.
The top backer cover will hide all of your cuts and you have several inches to work with so you do not have to be exact. The panels will interlock, each one sliding down over the previous one. Every five or six panels it is helpful to place a screw up near the top to hold them to the side of the home. The backer cover will eventually hold all of the panels in place so go easy on the screws.
The backer cover snaps into the backer. That part is very easy. The hard part is going around corners and any other projection type changes. You should have plenty of extra material to work with and a little trial and error with the tin snips should get the corners cut and mitered correctly.
Ordering vinyl skirting online is very easy. You will find everything you need at Mobile Home Parts.
In the Mesa Arizona area give me a call. CR Shades - Dennis Gourley - Sales - 480-935-2848
Hopefully this page has made your vinyl skirting installation go a little bit easier.